
New Helix / POD GO Users
People who have just purchased an Helix / HX Stomp / etc often contact me or post on social media asking what they should do first, so I’ve put together this page with some helpful resources for new users.
Update
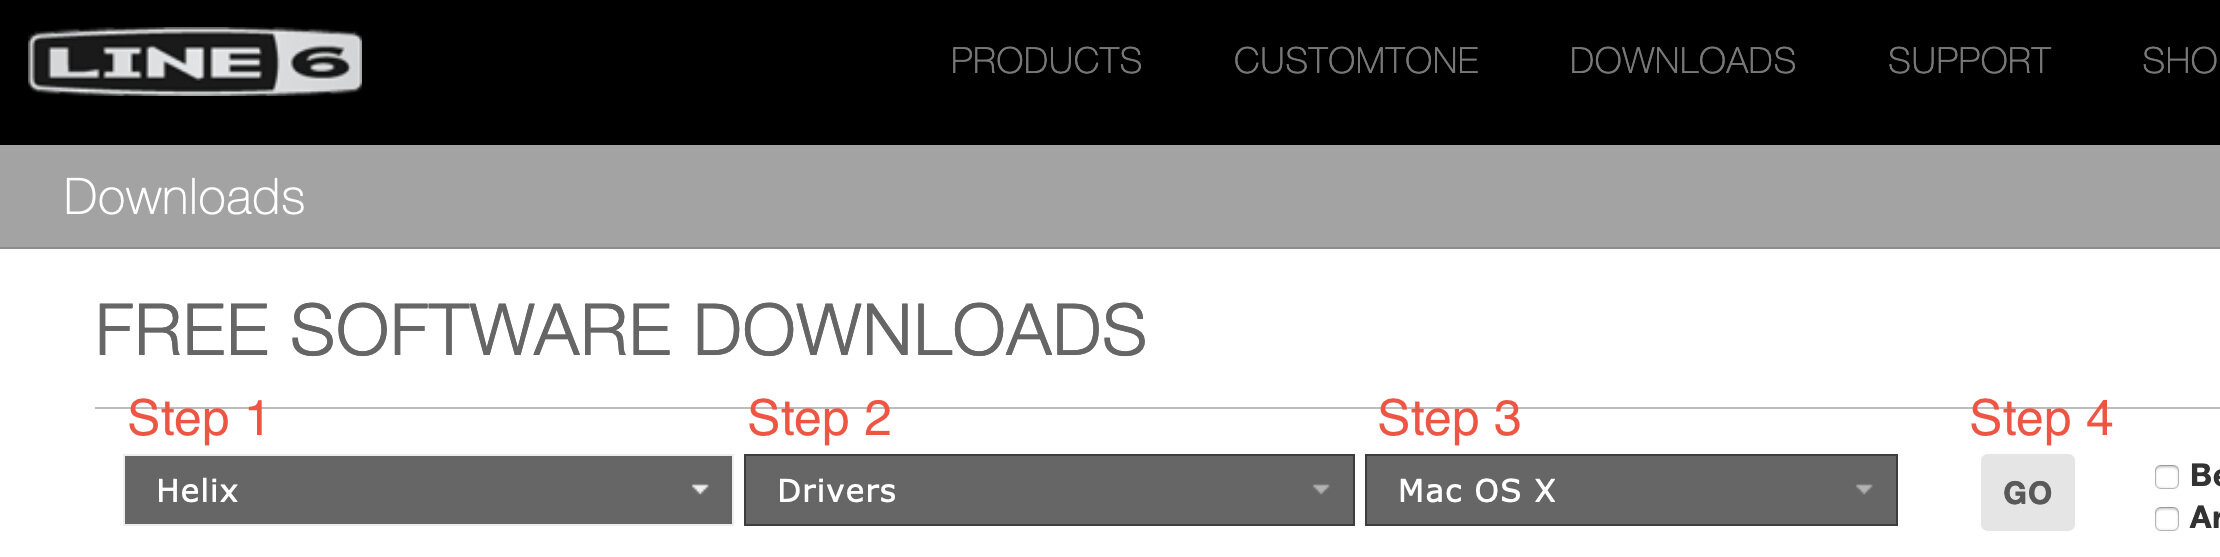
The first thing you need to do is update your unit to the latest firmware. Create an account at line6.com/software, download and install the latest version of HX Edit or POD GO Edit for your platform.

Once you click “GO", scroll down a bit on that page and click the first blue “Get Download” box. Then install HX Edit or POD GO Edit from that download. If you’re on Mac and it won’t let you install because it says “can’t be opened because Apple cannot check it for malicious software,” follow the instructions here.
For Mac users it’s helpful to also install the driver as this enables the use of your keyboard’s volume up/down buttons when using an HX or POD GO unit as your audio interface. Note that this currently does not work on MacOS Catalina. I use an app called SoundSource to globally control my Mac’s volume regardless of what audio device I’m using.
Once you have HX Edit or POD GO Edit installed, open it and click “Check for Updates” in the bottom right corner. Sign in, and then follow the instructions. If you’re having trouble, click here for more detailed instructions.
Monitor properly
Helix / HX Stomp / POD GO are professional devices, so they deserve to be monitored with decent headphones, studio monitors, or FRFR speakers. When you run direct, they recreate the signal from a mic on a guitar cab in another room, monitored through whatever speakers you use. This is a much different sound than a live guitar cab in the room with you and many people mistakenly blame the modeler for this difference, even when using high end speakers. Regardless, the sound you hear will always only be as good as the speakers you use, so some good studio monitors or headphones are worth saving up for. Check my Gear page for speaker and headphone recommendations at various price points.
If you do not already have a studio setup with an interface, monitors, etc, I recommend using Helix as your audio interface. Just connect the outputs of your unit directly to your studio monitors or headphones, and plug the unit into your computer with USB. This way you can use HX Edit or POD GO Edit, the audio from your computer will automatically be routed to your speakers or headphones, you can easily record yourself with a DAW, and easily play along with audio from your computer through the same speakers.

The Midland, Kansas City, MO, 2019
Get familiar with Your unit
Read the manual for your product (Helix, HX Stomp, HX Effects, POD GO). It’s important that you know what is meant by controllers, snapshots, stomps, footswitches, presets, the different footswitch modes, etc.
Here is a YouTube playlist I’ve compiled with a bunch of helpful beginner videos. It might be helpful for you to follow along with some of the preset build videos I’ve made.
Set your global settings
Read my list of recommended global settings. For me, the settings in that list give me the most flexible workflow. The most important setting is the input pad, which should be ON.
Download some presets
Once you are comfortable with the unit and have set your global settings, I recommend getting some presets from knowledgeable Helix users. I have a free AC30 preset available (Helix, HX Stomp, POD GO), as well as many commercial presets with more features like stereo amps, single coil / humbucker footswitch, more effects, etc. My presets are widely used in the Helix community, so Line 6 reached out to me directly and asked me to also put them on their official preset Marketplace, in addition to my own website (see the “Store” link above). Once you get them installed on your unit you can look at the signal path and see how I’ve put the presets together, in order to apply some of my techniques to your own presets.
How to Import presets + IRs
I have begun including custom IRs with some of my presets. Here are the steps to import the preset and IR onto your unit:
Ensure your hardware unit and editor are both fully updated. Instructions for how to do this are at the top of this page. If either your unit or editor are not fully updated, there is a chance the preset will not import properly or will not import at all. 99% of time when people contact me with problems importing presets, either their hardware unit or editor are not fully updated, and updating and re-importing the preset solves the problem.
The download is a zip file containing the IR and preset files. Both Windows and MacOS come with software to extract zip files. Once you extract the zip file, you will see the preset file for the unit you purchased (.hlx for Helix/HX Stomp, .pgp for pod go, .syx for AxeFX), as well as a .wav file which is the IR.
Import the IR onto your unit using the fully-updated editor. If you don’t know how to do this, please watch some of these videos.
Import the preset onto your fully-updated unit.
This video walks through the process: